MePACS Home Alarm
Self-Installation Guide
About the installation process
The installation process typically takes up to 30 minutes. During the installation, one of our experienced technicians will guide you through each step over the phone.
The installation involves a simple walk-through of your property to test the signal strength of the pendant in each room and around your property.
If you are not the client, please ensure they are present during the installation process as we will need to speak with them directly.
The installation involves a simple walk-through of your property to test the signal strength of the pendant in each room and around your property.
If you are not the client, please ensure they are present during the installation process as we will need to speak with them directly.
Installation appointment
An appointment should have been booked for you when you placed your order. If you don’t have an appointment time or wish to reschedule please call us on 1800 572 177 during the following hours:
Monday – Friday: 9am – 5.00pm
Saturday – Sunday: 10am -3pm
Monday – Friday: 9am – 5.00pm
Saturday – Sunday: 10am -3pm

5 Steps for Installing your Home Alarm
Just before your installation appointment, find a location for your alarm base unit on a flat, clear surface – it should be in a central area near a power point. (i.e. in your living room or kitchen).

Step 1
Take the black aerial out of the box then screw it into the plug at the top of your alarm base unit.

Step 2
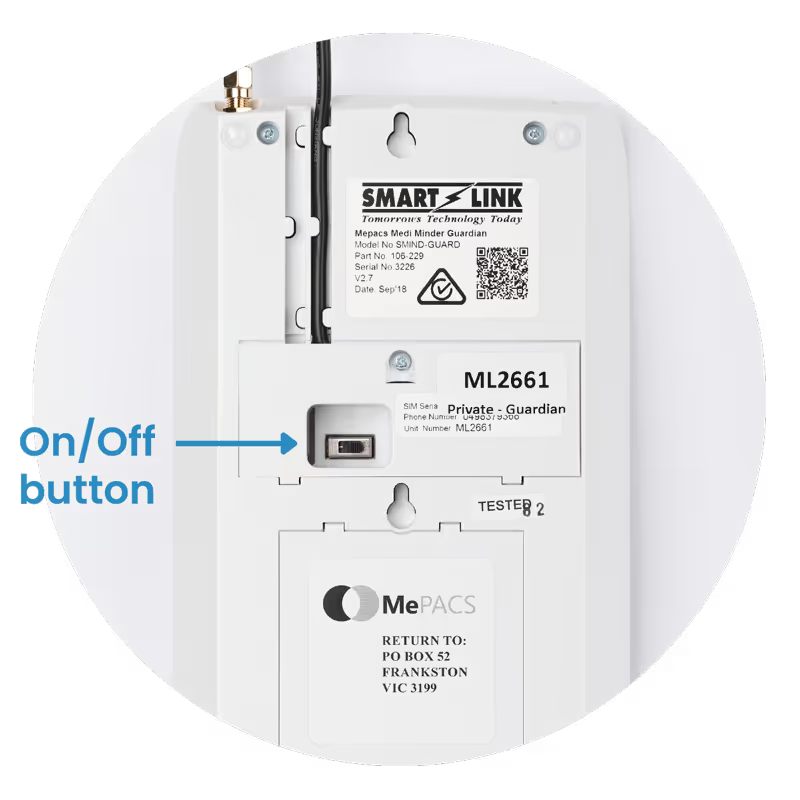
Turn on the alarm by switching on the small black button underneath the unit.

Step 3
Plug the base unit into the power point. Make sure the power point is on.

Step 4
The lights on the front of the base unit should come on.

Step 5
We’ll call you at your appointment time and talk you through the rest.
To download and print this step by step self-install guide, please click the button below
Download self-install PDF guide
How can we help?
By email
Existing clients, please email
mepacs@mepacs.com.auFor sales enquiries, please email
sales@mepacs.com.auLive chat
Our sales team is available online for live chat Monday – Friday
8.30 am – 5.00 pm AEST.
8.30 am – 5.00 pm AEST.
Start Chat


.png)

